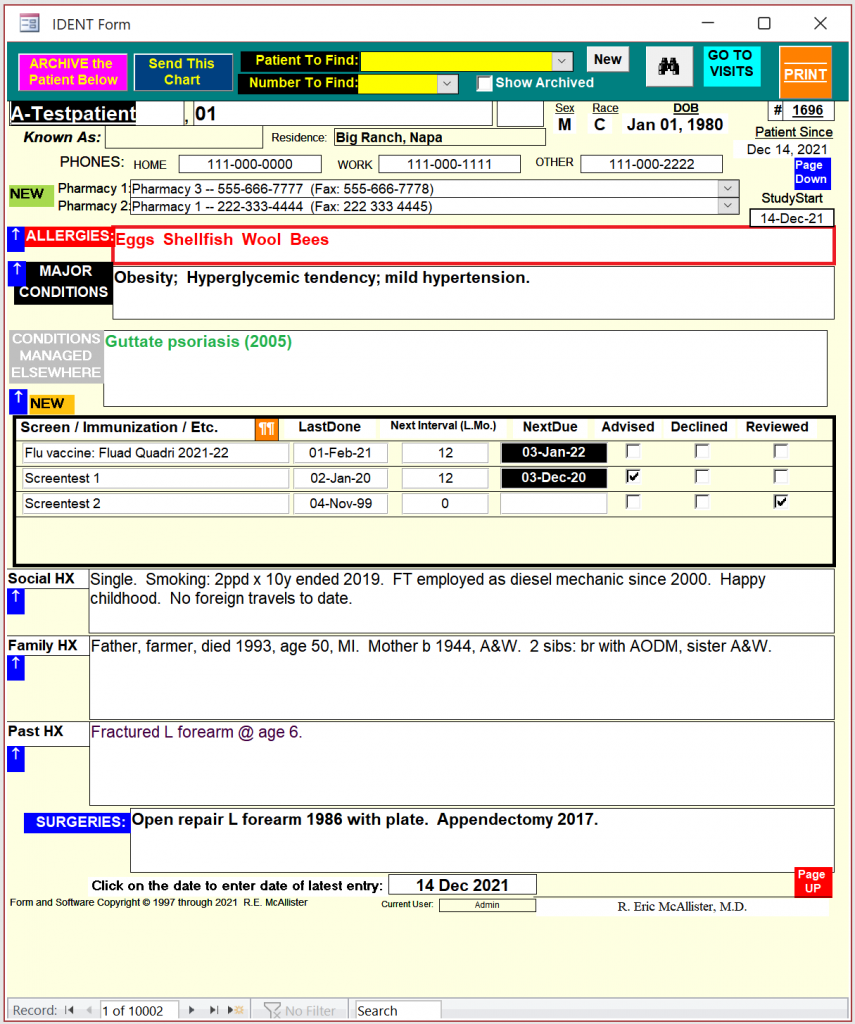
The opening User Data form is followed directly by IDENT, which is the master form that leads to all the others. This form contains a lot of background information on one patient, the kind that changes only infrequently. You can change any of the information any time, but you are more likely to just scan it as a reminder before you see the patient and record the information related to the current visit (using a different form, frmVisits).
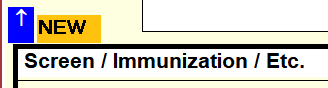
For ease of reading and entry, many text boxes on the larger forms have a standard blue and white expansion arrow near the left margin, like this:

When clicked, a larger version of that part of the form will appear. Sometimes the information may be too extensive for it all to appear on the form; in this case, expanding will make it all visible. Similarly, it may be easier to enter new information by expanding the entry area. When finished with any expansion form, simply double-click in the lower half to return to the parent form (where all the information is preserved, even if it is not all visible).
Another aid to reading appears on the two data-intensive forms (Ident and Visits): near the top of the right margin is a blue box labeled “Page Down” in white. Clicking on this will shift the page to ensure that the bottom is on the screen. Once done, a similar but red box appears labeled “Page Up” near the bottom right margin, and clicking on it will shift the page up again. If you are using a small screen that will not hold the entire form without zooming out, then these boxes allow you to easily move between the upper and lower parts of the form.


To ensure that the cursor remains on screen, the focus will move from the # field at top right to the Current User field at the bottom, when these shifts occur.
The top of this form (the “Patient to Find” combobox) is where you select the name of the patient you are concerned with at the moment. If for some reason you know the unique patient number assigned by the software to the patient, you could use the combobox just below, and choose that number instead. [If you have inactivated any records by archiving them, they can be found the same way if the “Show Archived” checkbox is checked.]

If the patient is new to the practice, look below for instructions on entering the necessary data.
If the patient is already known to the practice:
- Select the binocular symbol (which puts the focus in the Patient To Find combobox), and start to type the patient’s surname. Your typing will start to replace anything already showing, and the dropdown list will show possible matches.

- Once you have entered enough for the list to contain the patient you want (identified by first name, friendly name, and birth date), select that exact patient.The whole form will immediately fill with the appropriate data.
- Review this page before proceeding further. Most of the information here changes infrequently, but is there anything that needs to be edited or updated? If so, you can do it now, by directly typing in the changes. Anything added will be stored, to be seen every time the form is opened in the future. For a more detailed description of this form, see below (the directions for filling in a new form).
If any recommended screens or immunizations are due, the due date will be underlined in red. For your reminder notes on any screen listed, first use the enlargement arrow to go to the bigger form, and then double-click on that item; a new form will appear with the information, which can be amended or augmented if you wish. Double-click on the white area to close the form again.
If you wish to enter a screen or immunization appropriate for this patient, click on the expansion arrow to enter the larger form. Then open the empty combobox, and select the choice you want. As appropriate, enter the date last done, and if it is to be repeated, enter the interval in months (the Next Due field will then automatically fill). Double click to close the form. There are check boxes to indicate whether you advised the patient about the next due date, whether he declined, and also to indicate you reviewed the information with him.
If you need to add a new type of screen or immunization, click the orange NEW box.
A new form will open with the cursor in a blank field for the Screen Item name. Type that name in, and fill in any of the other boxes that may be appropriate. In the large white field below, type in any reminder notes you wish. When done, double-click to close the form and enter the expanded screens form. Then, if that entry is to be filled in for the present patient, open the first blank combobox and select it. Now double-click that form.
If any other information on this form can be updated, do so now, and then click on the box at the bottom of the form to update the entry date. (This is the last date the form was updated; if nothing new is added, leave the previous date unchanged).

When finished with this form, click the “GO TO VISITS” button in the header. You will now be taken to the Visits form.
If the patient is new to the practice:
Click on the gray “New” button in the header, to the right of the selection box.

A blank form for identification and background data appears, already populated with the current date. Fill in as much of the missing data as appropriate, ignoring the # field (which will be automatically entered once you start to enter other data). You must enter basic contact information by directly typing it in; and you may also enter the patient’s preferred pharmacies, if you know them. All relevant historical data (below) can be entered now as well, and will be visible on all future occasions; but alternatively you may also enter information any time in the future.
Pharmacy choices are made using comboboxes below the contact information line.

There is space for two, each populated directly, by clicking on one choice in the presented list. The pharmacy field is long enough to contain other information, such as a pharmacist’s name, or the address, too.
If you have not previously entered the desired information, click the green “New” button to the left. This opens frmPharmacies, and you can fill in the desired information in the bottom blank line. When done, double-click anywhere on the lower (green) part of the form (or on the X at upper right) to close it, and then open the combobox again to select the new data.
The Allergies and Major Conditions boxes are for simple text, which can be entered any time. They serve only as quick reminders — details will be in the Visits form. The same is true for the Surgeries box, at the bottom of the form.
Conditions Not Under Treatment is for problems being managed elsewhere, but which should nevertheless be known to you. The potential list is the entire ICD10 diagnosis list. You will select an appropriate entry from that list — but you have help! Simply begin to type in a diagnosis. Immediately the list will jump to items beginning with the letters you have entered; if nothing appears, there is no item whose name begins with your entry, so try again. These list items are the only ones that enable you to be claim payment in some areas, and they are internationally recognized for categorizing diseases, so undoubtedly you will soon learn which names to use, even if you prefer another. For example, you cannot enter “shingles” or “zoster”, common names for herpes zoster; but you will soon learn that “herpes” will lead you to the correct choice. Similarly, if the problem is cholecystitis, simply entering “chole” will give you reasonable choices. And so on. If you would rather not spend time on this now, just highlight your entry, press the Delete button, and leave the field empty until some later time.
The Screen/Immunization/Etc. entries are selected from a separate table [tlkpScreenCodes] that you may have filled out previously. When you click the Expansion Arrow, a new selection form appears; you can make your selection on that form, which also includes your notes on each selection.
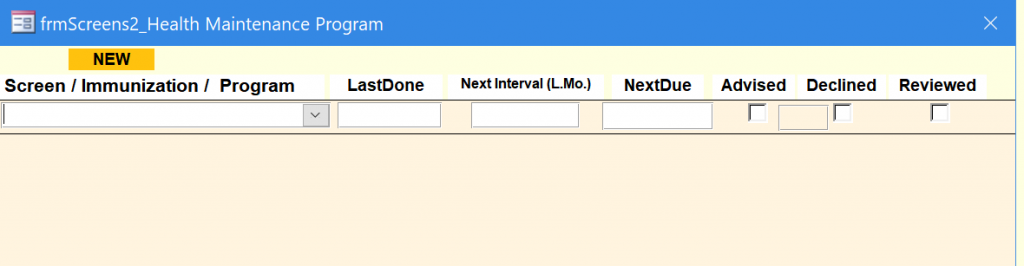
That screen-codes table is never complete, as new immunizations or screens may appear in the future. Therefore, you have the option of opening this table any time, and changing and/or adding to the entries as needed. Just click the orange New button to the right of the expansion arrow. If you click the expansion arrow instead, the list will be larger and easier to work with; and you can still enter new entries, by clicking on the orange NEW button at the top. As usual, just double-click or click on the X at upper right to be taken back to the IDENT form.
The Social HX, Family HX, Past HX, and Surgeries areas are all for your text entries. Enter any appropriate information you have, and amend it any time in the future. If you use the Expansion Arrow, just double-click to close the expanded form. These fields will always be on view in the future when you are about to contact the patient again.
When finished with this form, click the “GO TO VISITS” button in the header, to the right of the binocular button. This will take you to the VISITS form. [Note: ALL the information in the first line under the green header must be present, including the DOB in the correct format dd/mm/yyyy, before you can leave the form].
Summary of actions for each patient:
- Locate the patient of interest by starting to type the lastname into the Patient to Find combobox at the top of the page. Open the box, and scroll if necessary until you can click on the correct patient (firstname and DOB are also visible for each choice).
- Briefly review the page, update it if necessary [if so, click on the Latest Entry box at the bottom, to reset that date], and note if any screens or immunizations are due.
- Click on the Go To Visits button at top right.