ALL THE DATA FOR A SINGLE VISIT are entered either on, or else via, this form. The printed version will show ALL the text and data you enter, even if it is too much to fit on the screen.
(After completion, the form is to be printed, signed, and inserted in the physical chart at the end of the visit.)
Summary of actions for each patient:
As soon as you go to the Visits form, you see the record of the last visit. This is to allow you to refresh your memory of the patient you are about to see, to facilitate follow up on any ongoing investigations or treatments.
Now press the right-facing arrow on the top line, to go to a new Visits form for today. The current age is already shown (in decimal years). During the visit, either fill in the form as you go; or (my preference) leave the computer elsewhere and just jot reminders on a scrap of paper, then leave the examining room and complete the chart in your workplace.
- Using the small boxes above the Subjective area, select the type of visit: Regular if seen in the office, Not Seen if reporting a phone call or other information not obtained directly; Hospital if seen in a treatment facility; or Study if this visit is part of a clinical study protocol.
- Enter the patient’s weight, pulse rate, and systolic and diastolic blood pressures. If you enter a height too, then the BMI is automatically calculated.
- Enter the SUBJECTIVE information you have obtained from the patient. Remember, you can use instant entries if you wish, modifying them as appropriate for this patient.
- Enter the OBJECTIVE findings (again using instant entries if they save time and effort).
- Enter a brief ASSESSMENT, if that is appropriate in place of a new diagnosis — for example, “HT remains well controlled”. This field is limited to 150 characters; further explanation can be entered in Plan, and of course the diagnosis list provides an assessment too. Note that ongoing diagnoses are already listed on this page — use the nearby expansion arrow for a better view, if needed.
- Check the Ongoing Diagnoses: if any have resolved, enter a resolution date. That will instantly move the diagnoses to the Diagnoses Ended area, with its resolution date.
- If there is a new diagnosis, click the red NEW button. Enter as much of a search term as you think will be needed and press OK [example: diarrh]; then either enter another search term 2 to clarify [example: inf], or just click OK again. You will be presented with a list of possible diagnoses: click on the one you think is appropriate. If none satisfies you, click Try Again and repeat the process. If you make a mistake, click on the incorrect diagnosis and then on the red Delete Current Selection box, and that line will be removed. The choice you make enters the appropriate ICD-10 code, and also the current date as the date of onset (change this if onset was known to be earlier).
- Click on the yellow Svc box on the left, and use the combo box to select the service code that your staff should use for billing/insurance purposes. Explanatory notes can be entered in the white area at bottom. Double-click that area to close.
- If you are sending the patient to a consultant, use the Consultations combo box to select his name. If the desired one is not already in the list, click New Consultant and proceed to enter the details in the Consultants data table; then close the entry form, and choose that entry in the Consultation combobox.
- Now fill out the Plan area, to describe how you will proceed, using instant entries if they add to efficiency. (Click the Page Down button if this part of the form is off the screen).
- Decide on any prescriptions. Ongoing medications are shown (use the expansion arrow for a larger display). If medication has ended, enter an end date. For each new prescription, use the expansion arrow; then proceed to select the medication in the lowest blank combo box, and add directions, amount, and refill instructions. If the medication you want is not yet in the list, there are other boxes to click that will take you to the appropriate forms for entering them. Now print any prescriptions to be given to the patient.
- If laboratory tests or imaging are being ordered, use the same procedures to enter those in the Tests and Imaging areas. Now print the appropriate requisitions.
- In the boxes at the bottom, enter when you wish to see the patient next: enter the number of days, weeks, or months, and the return date will instantly be entered.
- Now print out the entire Visit, sign the sheet, and enter it in the paper chart.
- Click on the binoculars button at top to return to the Ident form and begin the chart for the next patient.
Details of this form:
This form looks “busy”, but that is intentional: it is intended to let give you an overview of the patient’s status as of the last visit, all in one glance. Any component of the form can be instantly enlarged via the nearby enlargement arrow, and a single button moves the page up and down if the entire page extends off the screen. If you made management notes then, you can review them before moving on. (My own usual procedure is to review this page, then go see the patient, and at the end of the visit I fill out the new visit form, and print it out for signature and filing).
The main principle to keep in mind is that this is really a simple “S.O.A.P.” form: if you wish, you need never use any parts of the form except simple text entries for Subjective, Objective, and Plan, plus make a selection of the diagnosis or diagnoses related to this visit. Everything else on the form is just there to make your life simpler, if you choose to do so.
The Header:

- When the form appears, it presents the date associated with the most recent visit, and the record from that visit is shown. The cursor is on the Weight field.
- To the right of the Age box, there are left- and right-facing arrows. These move the visible record backward or forward, one movement for each click on an arrow. On moving to a new visit with the right-facing arrow, the default is the current date; to change it, click on it, and select the desired date from the calendar box that appears (or, alternatively, type the new date into the date field, in the form mm/dd/yy).
- Also already in the top row are the patient’s name, and the age (calculated automatically from the visit date and the date of birth).
- In the header’s second row, there are fields for height, weight, pulse rate, and systolic & diastolic blood pressures. If both height and weight are entered, the BMI is automatically calculated and entered (it cannot be entered directly).
- Below the movement arrows, there is a “Go Back” button. When clicked, an input box opens; enter MM/YY in this (such as 09/05 or 11/99), and the record moves to the first visit after the start of that month. [If YY is <60, the year will be after 2000; otherwise, it will be 20th century]. The nearby “Now” button returns the form to the most recent record.
- The blue PageDown button will move the page view to the bottom, in case that was off the screen; there is a similar button, a red PageUp, for restoring the upper view. If you click on the Page Down button, it immediately becomes a Page Up button so you can go back to where you were.
- Clicking the binocular button closes this form and returns the focus to the Ident form, where a new patient can be selected, or chronic data for this patient can be updated.
The Form:
There are 4 possible visit types: Regular, Not Seen, Hospital, and Study.
- Regular visits are those where the patient is seen, but is not in the hospital.
- Study visits have different data recording requirements mandated by research, and so are a separate type.
- Not Seen records save the data on medical interactions not involving a patient visit — such as telephone advice, etc.
- Hospital visits record information acquired during a hospital visit, which is pertinent to the long-term care of the patient.
To the right of the label “SUBJECTIVE REPORTS”, click on the label for the desired visit type.
Visit Type=Regular
This consists primarily of the SOAP format: Subjective, Objective, Assessment, and Plan sections.
Where useful or necessary, these sections can be expanded using the expansion arrows. (When finished with an expansion form, double-click the lower half to return).
Details on each part of the form follow below:
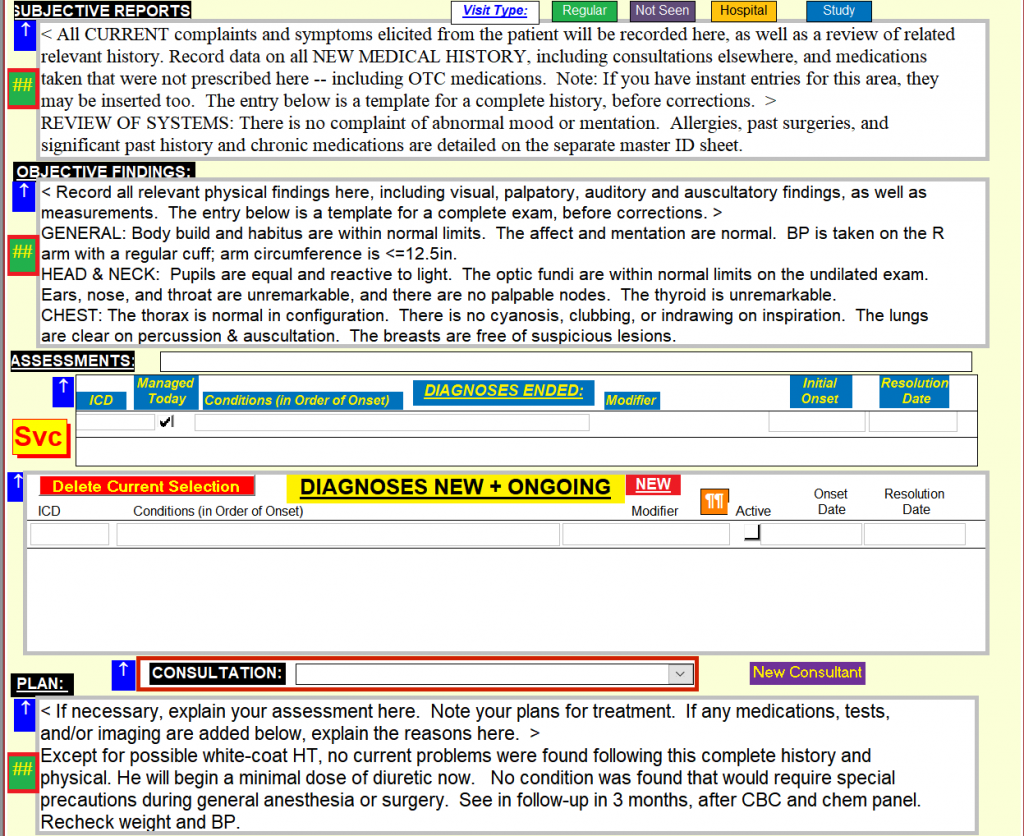
- Subjective Reports: Type in your summary of the patient’s own description of the problem(s) and history. The field will expand to contain any amount of text. To supplement extemporaneous notes, your pre-written “Instant Entries” save typing, and you then correct them to reflect the reality. These are entered by positioning the cursor where the entry is wanted, and then selecting the Instant Entry button — the green “##” button with red border — at the left of the text area.

- Objective Findings: Usage is exactly as above, but in this area you enter your findings based on your examination of the patient. Again, you can use the Instant Entries you have written [see Setup], selected via the instant-entry “##” button left of the text area. Note that as an option, some frequently used entries can be entered directly from the menu, without using the selection box; the ribbon is customized to show these special selections (see Setup page).
- Assessments: This area is actually subdivided into three others:
- The single narrow box below the Objective area is for the reason for today’s visit, which you type in directly using any wording you like. This need not be any “official” diagnosis — those are entered in the Diagnoses New and Ongoing area, lower down. For example, it could say “Discussion”, while the diagnosis related to the discussion is entered below.
- The single narrow box below the Objective area is for the reason for today’s visit, which you type in directly using any wording you like. This need not be any “official” diagnosis — those are entered in the Diagnoses New and Ongoing area, lower down. For example, it could say “Discussion”, while the diagnosis related to the discussion is entered below.
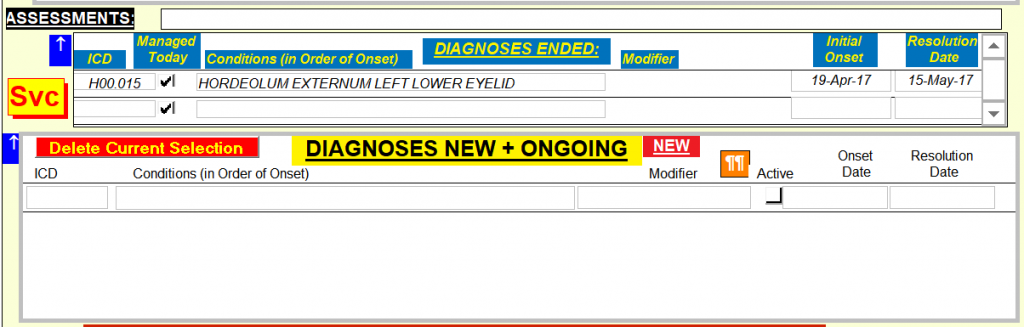
- The Diagnoses Ended area usually needs to be expanded for a complete view, using the expansion arrow. You may not need it, however. It is populated automatically; every time a condition is given a resolution date in the following part of the form, that diagnosis moves to this part for the future. As usual, double-click the expanded form to close it.
- The Diagnoses New and Ongoing area has various lines, depending on how many diagnoses have been entered in the past and not been noted as ended — with a blank line ready for the next one to be entered. The form gives a quick view, but usually you will find it better to use the expansion arrow to enlarge this part of the form. In the “Managed Today” column there are check boxes; simply check or uncheck these as desired, to confirm that today’s visit concerned those diagnoses. (There will frequently be unchecked diagnoses, which are not yet resolved but which were not involved in today’s visit).
- If an earlier diagnosis has ended since the last visit, enter the “Resolution Date” in that column. The next time a visit form is opened, it will have moved to the “Diagnoses Ended” area, higher up — as a reminder of this patient’s history.
- If today’s visit resulted in a new diagnosis, click on the bright-red “New” button (above the “Modifier” column). A box will appear asking for a search term (you are searching through the ICD-10 list of some 65,000 diagnostic codes). Enter as much of a term as you think you need (e.g. “cong” ), and click “OK” or press Enter. A second box will ask for another search term; either enter another (e.g. “lung”), or just click “OK” again. Now a form will appear with a selection of diagnoses, and when you click on one, it will be entered in your visit form, together with its ICD code and onset date of today (if onset was reportedly in the past, change it to that date instead). If none of the choices are suitable, just click “Try Again“; or if you decide not to enter a new diagnosis after all, click “Close“. [In the examples given, “cong” and “lung” resulted in 6 choices; “cong” and “hear” resulted in 23; “congest” and “heart” led to 14; and “cong” plus blank led to thousands. The diagnoses are sorted by code, so similar conditions appear together.]
- If the diagnosis is not new and not ended, then it still shows as an ongoing diagnosis.
- Reminder Notes: If you double-click on any diagnosis, a new form will appear with any of your previous notes regarding this diagnosis (these notes can consist of anything you wish: diagnostic approaches, management, particular experiences or patients, etc). You can add anything else now, and/or later when you have discovered something new worth remembering.
Plan:
This is handled the same as the areas above, and there are sub-areas just as in the Assessment area.
NOTE: If the form contains enough data to make it larger than your screen (or the size of the window you are using), a scroll bar will appear on the right. Move the cursor over the lower part of that scroll bar and right click; then select “Scroll Here”. That will move the visible part of the form accordingly. Or, alternatively, just drag the scroll bar.

In the Plan box, enter a description of your diagnostic and treatment plans as a result of this visit. Instant Entries can be used here too, for plans and also for tests ordered. (Tests being ordered clearly cannot have their results available by the end of the visit, so placeholders are entered; once the data are available, you can go back and add the numbers of importance, so data relevant to this visit will be recorded on the same page).
Medications:
Ongoing medications are shown, together with the start date, the amount prescribed, and the directions. Just as with the Assessment part of the form, the medications ended are moved to their own section. The entire list of medications ever prescribed for a patient can be viewed by using the expansion arrow.
If any new ones are being prescribed, click on the combobox in the “New or Changed Medications” area and start to type its name — or, use the expansion arrow to get a larger form. As the box updates, open the list by clicking on the right-hand arrow, and select the exact entry you want. Its name will then be entered, its start date of today, and you will can type in the directions below it. Moving to the right, enter the number of units to be dispensed, and the number of refills allowed (or leave the default “Call”). If you wish this medication to be printed on today’s prescription for the patient, tick the box. Reminder Notes: Once you have selected a medication, you can see your own notes about it by double-clicking on the drug name. While the form is open, you can make any changes or additions you wish, and they will be available on all future views. [See Setup for details on how you enter these notes at other times].
To add a new medication not already in your list, and notes about it, follow this procedure:
- From the top menu, select “Formulary“
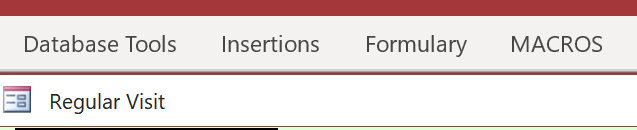
- Next, select which element you wish to add: Drug Class, Drug Marketer, or Rx Item: the appropriate form will then open.

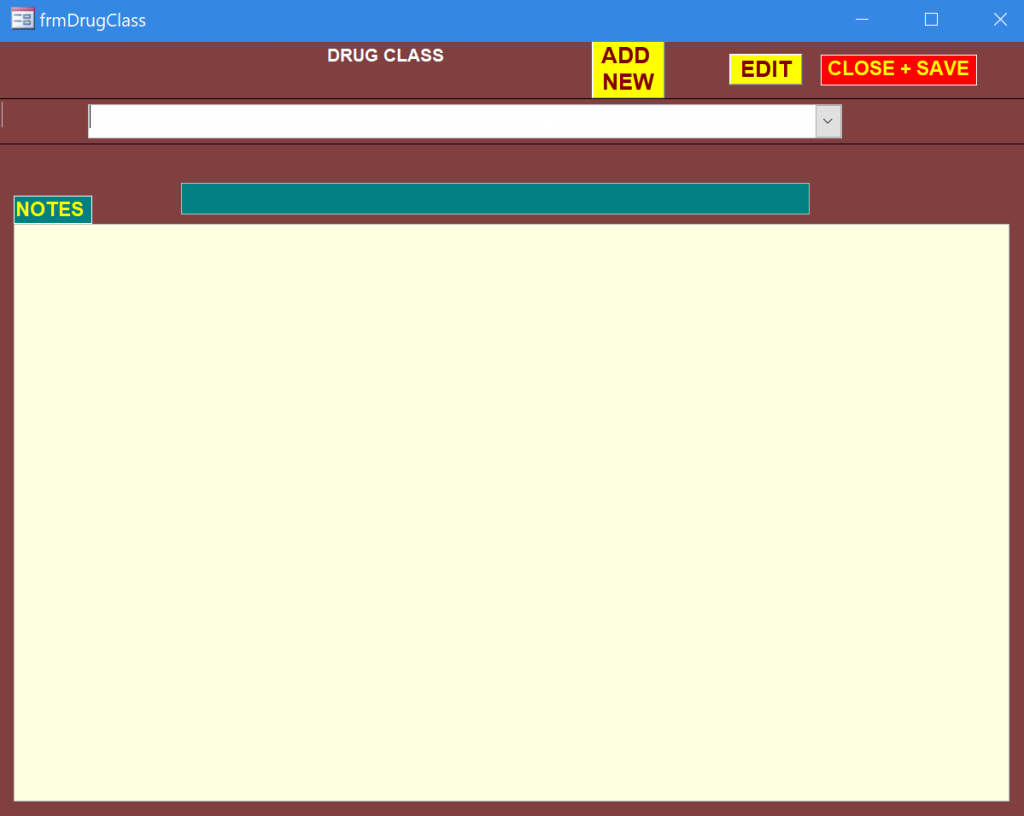
- For Drug Class:
- In the form that opens, click on “Add New“.
- Enter all the information you can. (Whatever is missing can be added at a later time).
- For Add Rx Item:
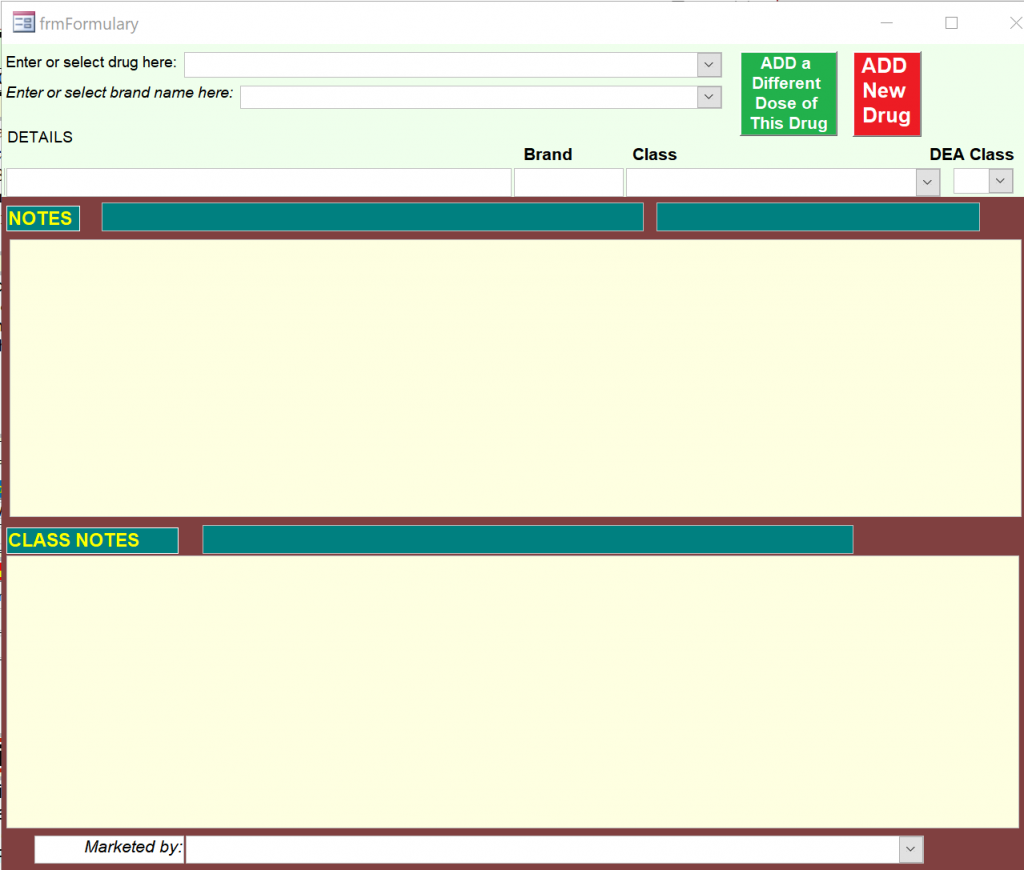
- Click on the red Add New Drug box.
- For the drug name, the most useful format is as follows:
- Generic name (like: Trade Name) *amount (the asterisk prevents any digit from being inserted in front of the original number)
- It is useful to fill out a separate form for each available form and amount; this saves having to fill in these data in each prescription, since the desired amount can simply be selected. The green Add a Different Dose box will ease this task.
- If one or more branded forms exist, enter those in the second box.
- If this drug is known as a member of a specific class, enter that in the third box.
- If it is a controlled drug, enter the classification in the DEA Class box.
- If you know the company marketing the drug, enter its name in the bottom line of the form. This may be of use if you wish to find prescribing information and updates.
- Once filling the form commences, the Notes and Class Notes areas become available. These can be edited at any time. Use them for reminder notes as more becomes known about the mechanisms, usage, interactions, and adverse effects of the drug.
- When done, double-click the form to close it.
- Note that drugs that are no longer prescribed cannot be removed from the list, once they have been prescribed: to do so would corrupt a past record. Any time you wish to edit an item, use this same form but do NOT click on “AddNew“; instead, simply open the top combobox to find the item to be edited, and proceed to edit anything in the white or yellow boxes on the form. Double-click anywhere to save the changes and close the form.
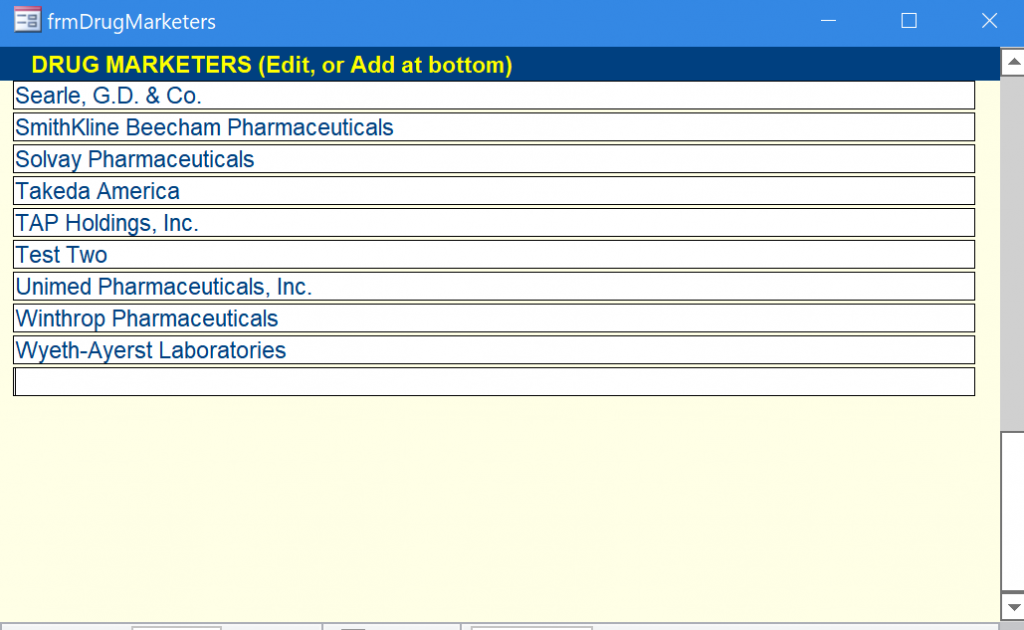
- For Add Drug Marketer:
- Simply type the name into the blank line at the bottom, then close the form.
- If Refills of any ongoing medications are to be allowed, click the purple “Select Refills” label at left.

A form will appear showing all the ongoing medications. For those to be refilled, if the amount and number of refills are the same, simply check the “Refill” button. If the amount and/or number of refills are to be different, enter the amount and number of refills in the grey fields, and check the “Refill” button.

For a history of previous refills, double-click on the drug name.
If a prescription is to be printed, check the “Print” button; then, clicking on the red “Show Prescription” label at the bottom of the form will show the prescription that is to be printed.
If all is correct, click the “Print” button, and give the prescription to the patient or fax it to the pharmacy; if incorrect, close the form and start again. [If no printed prescription is needed, leave the “Print” boxes unchecked; the prescription details will still be noted in the chart.]
Tests: Order tests by clicking on the blue “NEW” button at the left of the tests box (the expansion arrow shows the tests ordered, without allowing new ones). The new form that opens is the requisition that will be printed and given to the patient (or faxed to the lab).
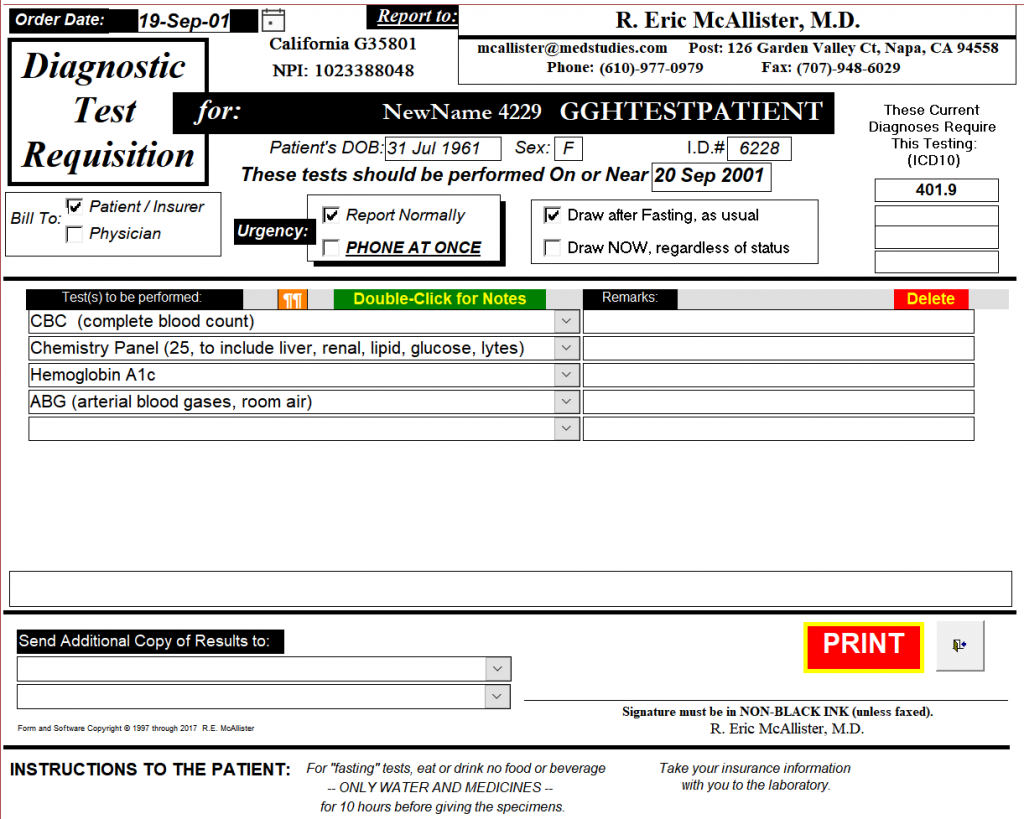
Proceed in the following order to complete the form:
- Bill to: click on the appropriate check box.
- Urgency: click on the appropriate check box.
- Draw sample when: click on the appropriate check box.
- Choose ICD codes: Click on the red button to get a larger form with comboboxes. Open each combobox as desired, working from the top down, and choose the code you wish to have entered on the requisition; all the available codes are those you have already listed as new or ongoing conditions on the visits form. Press OK when you have entered all the codes you want.
- Choose the tests: Click in the top combobox, and start to enter the test you want. If it is already stored in the list, it will appear as a choice; if it is not, a message will appear informing you. You can also open the combobox and look through the whole range of tests available, if you prefer. [Note that in the Setup pages, you will find how to add to this list of tests]. Click on a choice to choose it; then enter any desired remarks in the box to its right. Continue to select tests, if others are desired. NOTES: If you double-click on any test, a new form will appear with any notes about this test that you have previously added. You can add to these reminder notes now, or later.
- Additional copies of results: Use the lower left area to select where additional copies of the results should be sent. Note that the form already contains all your own contact information, the date, and the patient’s name, sex, and DOB.
- Print and exit: The form is now complete. Press the red PRINT button to print it. Then sign it, and hand it to the patient or fax it to the lab. [In case you decide not to print it, press the exit button to the right of the Print button; the requisition will still be saved in the record, and you can recall it any time].
- Note that henceforth, the tests ordered will remain visible in the box on the Visits form for this date. Use the expansion button to see the full requisition. (A double-click will close it again).
Imaging: Complete an Imaging requisition in exactly the same way as for Tests, above.
- Note that the imaging appointment details cannot be filled in by computer; it is assumed that someone else will need to make the arrangements, and they can be written in this area by hand.
- If the list is too long for this form, it will still be printed appropriately. It can be viewed using the scroll bar on the right.
- There is a “Print Now” checkbox to the left of each test . If different images will require different testing facilities, then multiple copies can be printed, showing only the tests with Print Now checked.
- As with Tests, the requisition will show henceforth on the Visits form for this date, and can be viewed by clicking on the expansion arrow.
Consultation(s): If you are sending the patient for a consultation, use the Consultations combobox, just above the Plan box.

- If you want to review any past consultations, click on the expansion arrow at left, and a new form will open showing them all.
- Select the consultant you want from the dropdown list of the combobox.
- If the consultant you want has not yet been registered in the database, then click on the New Consultant button to the right. The consultant registry will open; fill it in, then close that form, and select the new entry in the combobox.
Return Visit: If you suggest a return visit, go to the bottom of the form and enter the number of days, weeks, or months in the appropriate box. The date of that visit will then appear in the Next Visit box. All months are assumed to be 30 days. If you wish the next visit to be on the same day of the week as this one, then enter weeks instead of months.

Billing: Click on the Yellow “Svc” button, on the left of the form at the DIAGNOSES ENDED area, to enter the billing data. This brings up a form with comboboxes for multiple service items.

Starting at the top line, open the combobox on the left and choose a service. The related code will then appear in the right-most box. Between the two, another combobox will allow you to choose the diagnosis or diagnoses that justified this service charge.
This list of services stays with the record of this day’s visit. It does not have to be printed now.
Whenever desired, a report [rptServices] can be printed for the billing personnel. It will list the services provided between any specified dates, together with the dates, service codes, and related ICD-10 codes. By this means, billing personnel have no need to see medical records; all the relevant information is right at hand, for insertion onto billing forms for third-party insurers.
Print the Record for the Physical Chart: Use the orange PRINT button at top right. This electronic record, and all the others in your practice, can be stored such that it is readily available to you at home, while traveling, or anywhere. It can be carried on a memory stick, stored on the cloud, or maintained in your laptop. (Obviously, proper backup is essential to avoid loss by equipment failure, theft, etc.). Of course, you must ensure that any storage method is secure against data theft or damage.
However, a signed hard copy will always be the best legal record. CHARTSandNOTES is intended to be convenient, comprehensive, and confidential in its electronic form; but you are strongly advised to print all your records, sign them, and store them in standard-format paper medical record charts. By doing so, you will have better records than almost any court will expect! And no problems with FDA inspections either, for those of you doing clinical studies.
Visit Type=Not Seen
This form is similar to the Regular form, but much simpler. All relevant data from the encounter can be recorded: subjective reports, objective data reports, consultations, plans, new or changed medications, and tests and/or images ordered. The date of the recommended next visit is also recorded.
This record should be printed and inserted in the office chart, just as is done for other visits.
Visit Type=Hospital
This form also resembles the Regular form, but is meant to summarize pertinent hospital data for the ongoing office chart. It indicates whether the in-hospital management was by other physicians or not, and it records consultations. Actual hospital records are not included — they would be too bulky for an office chart.
When in-hospital management is by you and/or your associates, you will primarily be using the hospital’s charts (paper or electronic). You may find it convenient to update a new page of this form after every visit with a brief report on status and management changes. Alternatively, a single page of this form may be brought up to date after discharge and then be printed for your office chart.
Upon discharge, it is of course especially important to update the medication lists, as it is not uncommon for additions to be made as short-term courses of treatment, or even sgnificant changes to to chronic regimens.
This record should be printed and inserted in the office chart, just as is done for other visits.
Visit Type=Study
Clinical studies require specific data that may not be useful in regular practice. In particular, it is usually important to “start off fresh” — the subject’s present condition must be noted, but it is changes that are important for the study — especially if they can be linked to the investigational material (drug, device) or procedures. The most important changes are the adverse experiences — changes from status at study entry. These will be tracked from onset to resolution, and management and outcome are reported. The Study form is quite similar to a regular visits form, despite its somewhat different purposes. During the course of a study, regular visits can be accommodated too. The data on the Study visits forms comprise the “source data” for the study, and these data are typically also entered in specific case report forms or online records supplied by the study sponsor.
These records should be printed and inserted in the office chart, just as is done for other visits — although if required for the study, they can be grouped together instead.
Go to Post comments here: