First, decide where on your computer you are going to store the program and data. Even if you are regularly backing up to the cloud (for example, by using OneDrive), you still need to know the LOCAL storage place — where it is stored initially, before the cloud gets caught up. That folder will always be available to you.
When you first download the program, it will include several files. The “front end” holds all the programming (and a little data), and the “back end” holds practically all the data you will be generating in your practice. There could be two other small files, one a separate database for lab data, and the other an Excel file for graphing certain data points [Note: these may become available at a later date]. Store all these in your chosen folder.
Now start the program, by opening the file CHARTSandNOTES_v5.accdb. That will open MS Access, either by using the free runtime version that comes with the program, or alternatively by using your own version (which you have purchased separately). You will be presented with the new form frmOpenEHR.
frmOpenEHR
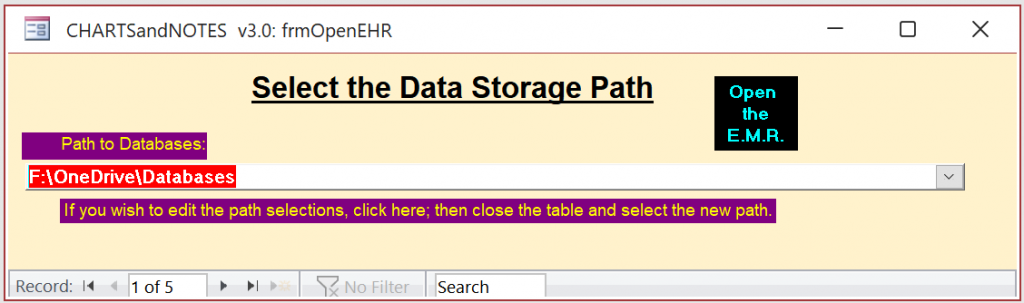
This form will always be the first one shown after starting up. Since you may be using different computers at different times, your storage location may change. This form needs you to confirm the storage location you are using at the moment.
If, on the other hand, you are beginning to work on a different machine, the path to the data may not be the same. That will cause a notice to appear, stating “One or more links have failed to refresh” and some helpful information about making the _data and _labs databases available.
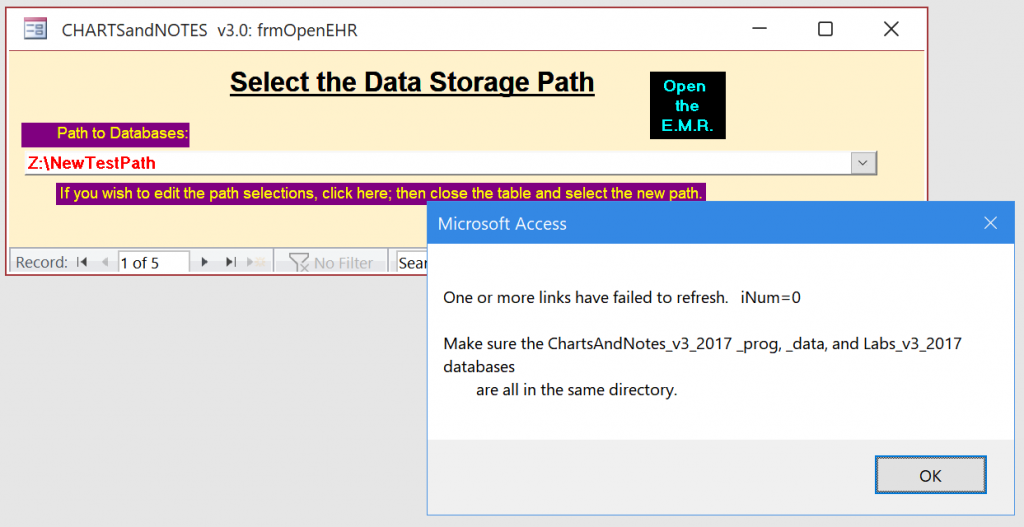
Press “OK” on that message, and then open the “Path to Databases” combobox (click the down arrow at the right of the box containing the path name). A drop-down list will appear. If you see what you already know is the correct path on this machine, select it, and try “Open the EMR” again. If the failure message does not appear, you are ready to move on.
If the failure message does appear again, you will need to enter the correct path in the table that stores them. Click on the message below the combobox, and that table will open:
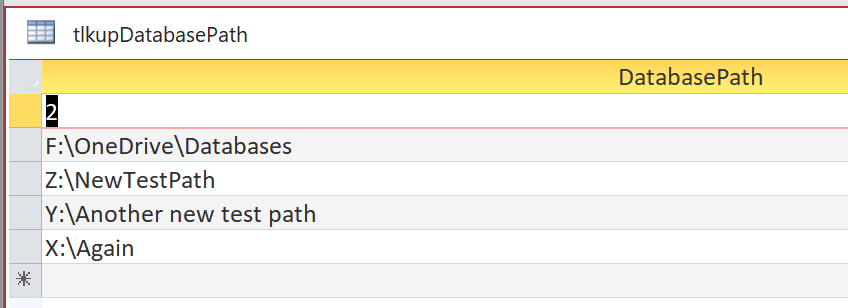
Type in the correct path address in the bottom line, and click the X at upper right to close the table. Now, back on the Select Path form, open the combobox again and select that new address. If no failure message appears, you are properly connected and ready to open the EMR. (If the failure message does appear again, it indicates that there is something wrong with the path address you entered. Just try the same procedure again until you have the correct path entered).
Once you have found the correct address and clicked on the “Open the E.M.R.” button, the following form (“frmUserData“) will appear:
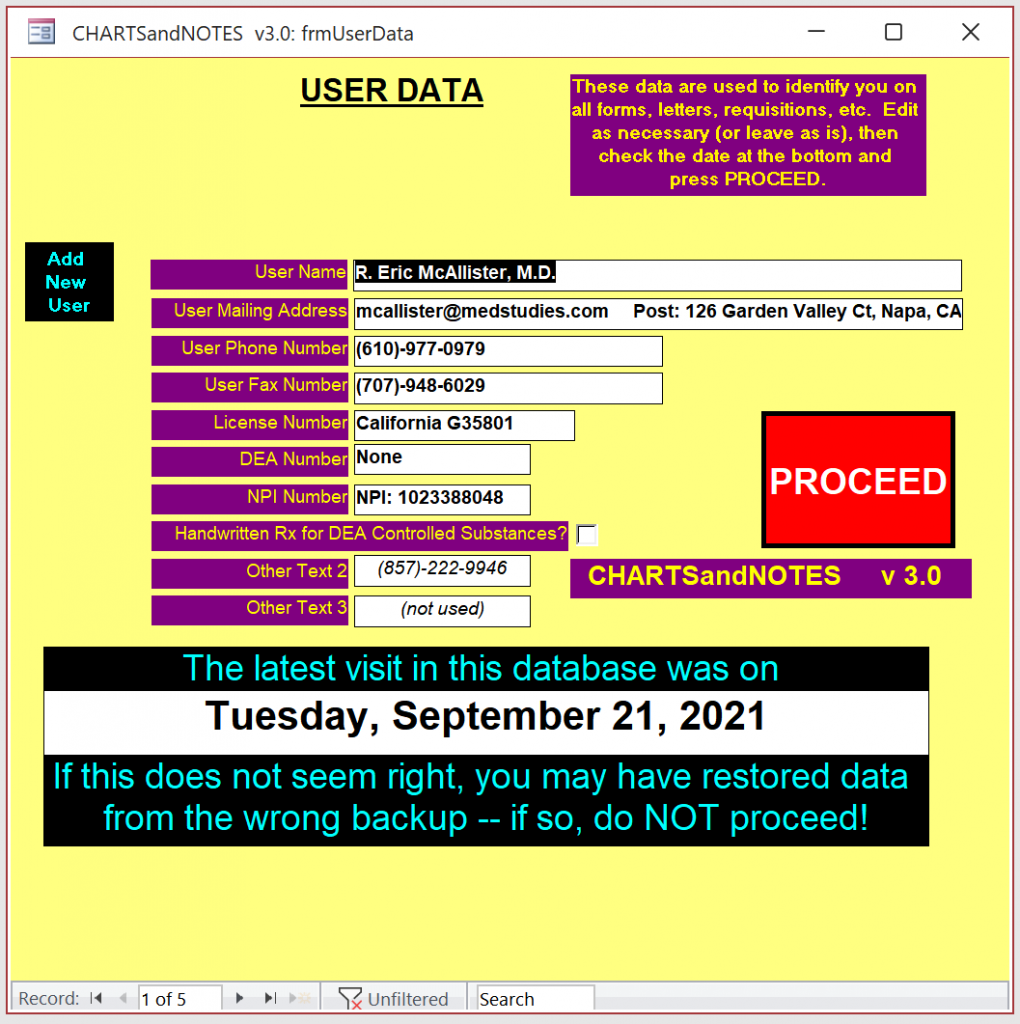
frmUserData
At a minimum, you need to fill in this form, since it provides the contact information on all your prescriptions, letters, etc. Double-check all entries, as you will probably not spend any time on them in the future. This form also shows the last time the data was accessed, to give a warning if an obsolete saved backup is being used.
The Select User Name entry at the top is a combo box. It links to a table of all the users of the program. Henceforth, before proceeding, make sure that the user data is YOURS, and not some other user’s. If the rest of the form does not already contain your own data, then open this combo box and select your name.
If you have never entered your data before, or if any of the combo box’s entries require editing or updating, click on the “Add New User” label left of the User Name line. That will open the form frmNewUser, which displays a single user’s information.
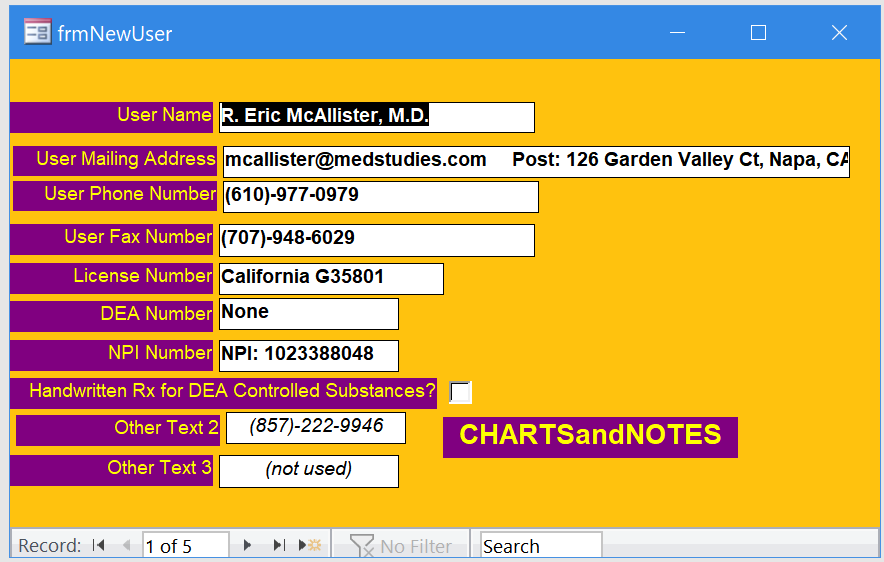
Note that there are navigation choices at the bottom of the form, allowing you to go forward or backward in the underlying data table. Find the one to be edited, and just edit in place. If you are entering data for a new user, just move forward until you are at a blank form, and fill in all the data. Once done, close the form (click X at top right), and you are back at frmUserData. Make sure you name is now selected in the UserName box.
Note the very large label marked “PROCEED“. If and only if the date shown as “the latest visit in this database” appears to be correct, click on this label. If that date does not seem correct, you may be restoring from an outdated dataset, and you may lose some data! [If data is lost, there is a reasonable chance of regaining it, if you can also open the correct database before anything in it has been changed. It can take a lot of work, since it requires placing copies of the program, data, and labs databases in a different folder, opening the program in both folders, and then painstaking copying each field of each mising record from one window to another. If you find yourself in this position, proceed very carefully!]
In the future, even if everything else seems correct and not in need of changes, ALWAYS CHECK THIS DATE. This is for your protection — you do not want to have to enter missing data all over again.
Now, the form “Ident” will appear. [see the next page of this “Guidance” section]
On to: 2: IDENT — The Patient’s Summary Data